
Using Amelia in Elementor Popup
Date: November 5th, 2021
When you have created Employees, services and/or events in Amelia, you can add them on front-end using
our shortcodes, which are explained in detail in the article "Amelia Shortcodes and Front-end implementation".
In Elementor widgets, simply search for “Amelia” in Elementor’s side bar, and drag the widget onto a page:
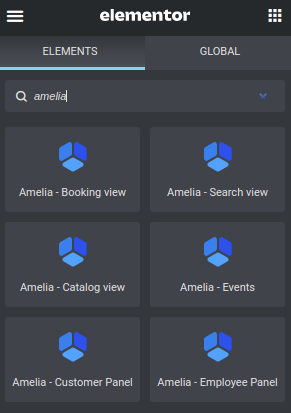
When it’s dragged into the page, the same parameter options seen in the Gutenberg block are shown in
Elementor’s side panel:
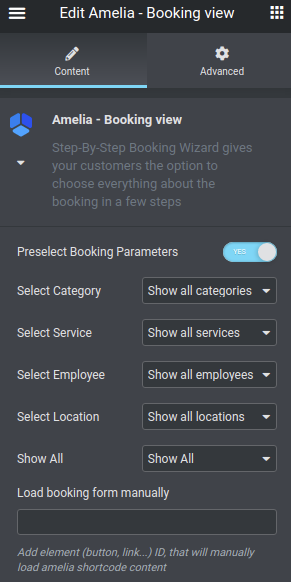
So, to cover all options in here real quick:
- Select Category – allows you to select a specific category you have created in Amelia.
- Select Service – allows you to select a specific service created in Amelia;
- Select Employee – selection which filters the form per selected employee;
- Select Location – if your employees are working on multiple locations, you can choose which location’s
bookings will appear in the window. - Show All refers to “Services” and “Packages”, and is only available in Amelia’s Pro license (since
packages are not included in the Basic license). With this option, you can choose if the form will show both
services and packages (all), only services, or only packages.
All these can be combined, but please be careful that you’re selecting actual values. For example, if you select [ameliacatalog category=1 employee=3 location=2], and there’s no Employee #3 working on Category 1, or on Location #2, the booking form will continuously load, and will not display anything. - Load booking form manually – this is used for popups within Elementor, and that’s what we’re going to explain now.
First, you need to actually create a Popup in Elementor, following Elementor's tutorial here.
We added a shortcode for the popup - it needs to have the ID of the button that is calling the popup, so this is
how one of the shortcodes should look like in the Elementor pop-up:
[ameliabooking trigger=amelia-button-id]
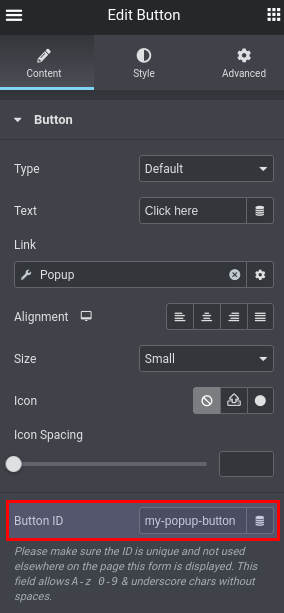
So, if the button ID is "my-popup-button" it will be:
[ameliabooking trigger=my-popup-button]
So, you create a Popup and add this shortcode in the popup.
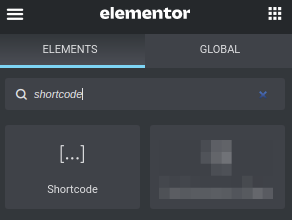
Please note: At the moment, you cannot use Elementor's Amelia widgets in the popup, so when configuring the popup, make sure to add the "Shortcode" widget, and manually type the shortcode you need:
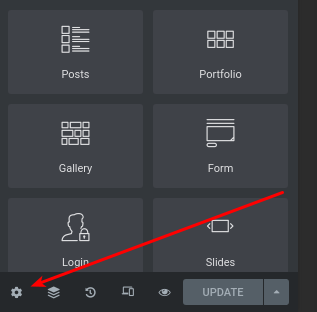
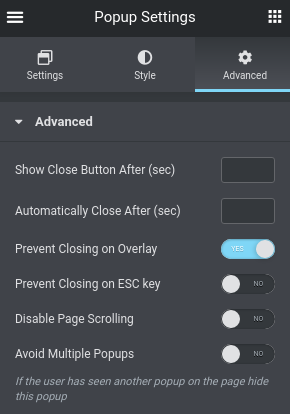
On the bottom-left part of the screen, click on the gear symbol to access Popup Settings:
In there, go to "Advanced", and enable "Prevent Closing on Overlay":
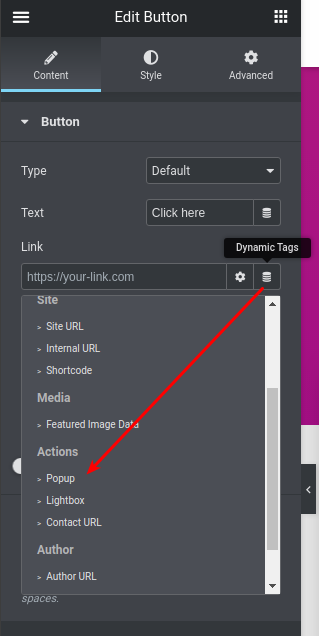
Then, on the page - add a button, on which the popup will be called, next to the "Link" field click on "Dynamic Tags" and select "Popup" from the drop-down:
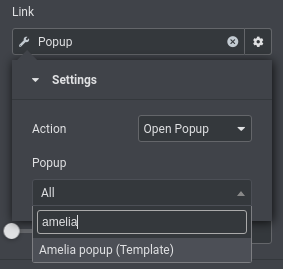
Then, click on "Popup" in the link field, and you'll see the settings for the popup. Click on the "All" drop-down, and type the name of the popup you previously created. Select it, and click away to close the settings:
In the same form, below, you will see the "Button ID" field, where you need to add the ID for the trigger (from Amelia's shortcode):
That is it - once you publish this page, when you click on the button, it will open a popup which will manually trigger the "my-popup-button" and open Amelia's booking form.

