3. Are You Getting “The link you followed has expired” Error in WordPress?
4. Installation
5. TMS Store
6. Upgrading Licenses
7. Refund Policy
8. Licenses, Purchase, and Activation
1. Updating the plugin to the latest version
Updated on: February 21st, 2024
PLEASE NOTE: TMS (our company) currently has two WordPress plugins and 6 wpDataTables add-ons:
Amelia;
wpDataTables;
Master-Detail Tables - an add-on for wpDataTables, which requires wpDataTables in order to work;
Powerful Filters - an add-on for wpDataTables, which requires wpDataTables in order to work;
Report Builder - an add-on for wpDataTables, which requires wpDataTables in order to work;
Gravity Forms Integration for wpDataTables - an add-on for wpDataTables, which requires wpDataTables and Gravity Forms in order to work;
Formidable Forms Integration for wpDataTables - an add-on for wpDataTables, which requires wpDataTables and Formidable Forms in order to work;
Forminator Forms Integration for wpDataTables - an add-on for wpDataTables, which requires wpDataTables and Forminator Forms in order to work;
This article provides comprehensive instructions on updating these plugins/add-ons to their latest versions, as the process is similar for all of them. If you do not have a specific plugin installed or it does not require an update, feel free to disregard the instructions related to that plugin.
If you activated the purchase code in Amelia Settings/Activation, or in wpDataTables Settings/Activation, the update should be offered in the Plugins section. On some WordPress installations, you need to deactivate the plugin first in order to see the update offered, so please try that.
If that doesn't work, try going through Dashboard/Updates. See if you can update the plugin through there, and if that doesn't work either, you can follow the manual update procedures below.
MANUAL METHOD 1:
Log into our store with the credentials you received when you purchased the plugin, and download the installation file from there, or from Envato (depending on where you purchased the plugin from).
Amelia:
Go to Amelia Settings/Activation, and make sure that the "Delete Amelia content" slider is disabled.
wpDataTables:
Go to wpDataTables Settings, and make sure that the "Prevent deleting tables in database" checkbox is enabled.
Then, go to your Plugins section and deactivate the plugin. If you're using WordPress 5.8+, you'll be able to go to the Plugins section/Add New, and upload the file you previously downloaded.
When you upload the file, WordPress will inform you that you're replacing the plugin with the new version, so just confirm that. After the plugin is installed, activate it, and make sure to purge all cache from your website.
MANUAL METHOD 2:
Log into our store with the credentials you received when you purchased the plugin, and download the installation file from there, or from Envato (depending on where you purchased the plugin from).
Use FTP to open /yourwordpressfolder/wp-content/plugins
Delete the existing plugin folder ("ameliabooking" or "wpdatatables")
Open the zipped file, and extract the "ameliabooking" or "wpdatatables" folder you see in the zip file into ../wp-content/plugins/ folder
Go to the WP-admin panel and open the Plugins section
Deactivate the plugin, and then activate it again
Clear server and browser cache
MANUAL METHOD 3:
Log into our store with the credentials you received when you purchased the plugin, and download the installation file from there, or from Envato (depending on where you purchased the plugin from).
Amelia:
Go to Amelia Settings/Activation, and make sure that the "Delete Amelia content" slider is disabled.
wpDataTables:
Go to wpDataTables Settings, and make sure that the "Prevent deleting tables in database" checkbox is enabled.
Go to the Plugins section, deactivate the plugin, and then delete it (you will not lose your data because you made sure the database tables are not deleted).
Click on "Add New" in the Plugins section, and upload the previously downloaded file.
Activate it and make sure to purge the server and browser cache
Prices are subject to change without prior notice.
All license plans are based on a yearly subscription or a lifetime purchase and all licenses include support and monthly updates the whole time the subscription lasts (lifetime in case you purchase a lifetime license). All three licenses can be used on an unlimited number of subdomains.
If purchased through our website, the licenses available are:
Basic - Add-on that can be used only for one domain or project.
Pro - Add-on that can be used for 3 domains.
Developer - Add-on that can be used on an unlimited number of domains.
The add-on is not available on the Envato marketplace
The add-on requires wpDataTables to be installed and activated in order to work. It is not a stand-alone plugin and its features are presented from the table settings block above each table.
Regular - Add-on with a lifetime license that can be used by you or one client, in a single end product which end users are not charged with - price $195. There is an option to extend the support period up to 12 months upon purchase, and in that case, the price is $266.25.
Extended - Add-on with a lifetime license that can be used by you or one client, in a single end product which end users can be charged with - price $975. There is an option to extend the support period up to 12 months upon purchase, and in that case, the price is $1331.25.
The add-on requires wpDataTables to be installed and activated in order to work. It is not a stand-alone plugin and its features are presented from the table settings block above each table.
Regular - Add-on with a lifetime license that can be used by you or one client, in a single end product which end users are not charged with - price $175. There is an option to extend the support period up to 12 months upon purchase, and in that case, the price is $238.75.
Extended - Add-on with a lifetime license that can be used by you or one client, in a single end product which end users can be charged with - price $875. There is an option to extend the support period up to 12 months upon purchase, and in that case, the price is $1193.75.
The add-on requires wpDataTables to be installed and activated in order to work. It is a stand-alone plugin, and it is accessed outside wpDataTables settings, but it does create reports based on data from the tables you have created.
Regular - Add-on with a lifetime license that can be used by you or one client, in a single end product which end users are not charged with - price $195. There is an option to extend the support period up to 12 months upon purchase, and in that case, the price is $266.25.
Extended - Add-on with a lifetime license that can be used by you or one client, in a single end product which end users can be charged with - price $975. There is an option to extend the support period up to 12 months upon purchase, and in that case, the price is $1331.25.
The add-on requires wpDataTablesand Gravity Forms plugins to be installed and activated in order to work. It is not a stand-alone plugin and its features are presented from the table settings block above the table created as a table linked to an existing data source.
Regular - Add-on with a lifetime license that can be used by you or one client, in a single end product which end users are not charged with - price $175. There is an option to extend the support period up to 12 months upon purchase, and in that case, the price is $238.75.
Extended - Add-on with a lifetime license that can be used by you or one client, in a single end product which end users can be charged with - price $875. There is an option to extend the support period up to 12 months upon purchase, and in that case, the price is $1193.75.
The add-on requires wpDataTables and Formidable Forms plugins to be installed and activated in order to work. It is not a stand-alone plugin and its features are presented from the table settings block above the table created as a table linked to an existing data source.
3. Are You Getting “The link you followed has expired” Error in WordPress?
The message, ‘the link you followed has expired,’ is most often received when you’re uploading either a WordPress plugin or theme.
With all standard WordPress installations, there is a server setting that limits the upload of files over a certain size. There is also a setting that prevents scripts from running for too long, causing any script that exceeds the limit to timeout.
This means that when you try to upload a file that’s over the size limit, or the upload takes too long, you’ll get an error message. This is the one that reads “the link you followed has expired”.
To find out the size of the upload limit, you can go to the Media section of the WordPress dashboard, then click ‘Add New’. At the bottom of this page, you will see the text: “Maximum upload file size: …”
The default file size limit is usually pre-configured at 2MB which is quite low, especially for WordPress theme uploads. In the following sections, we’ll show you how to change this to a higher value, as well as set a more reasonable script timeout limit.
How to Fix the Error
So, if the link expired, what do you do? The answer is clear —if the setting is too low, you need to increase the limit. Luckily, this is not too tricky to do, even for a beginner.
There’s more than one way of increasing the limit to avoid ‘the link you followed has expired’ message. Don’t get scared, but they all include adding some code. This isn’t as hard as it sounds —if you can copy and paste, then you have all the necessary skills.
At the same time, we’ll also be increasing the time your site allows a file to execute (in this case, how long it takes to upload a file, theme, or plugin).
We will provide a step by step guide, making this as easy as possible. Follow along and make sure you complete all the steps for the method you are attempting. Try the methods one at a time.
If a method doesn’t work you will need to undo what you did before trying a new method. This is important to make sure your website continues working smoothly.
Method 1: Change the functions.php file
The functions.php file is a core file for WordPress sites. Do remember that the file is linked to the theme you use. So, if you change your theme later, you’ll need to repeat this method to increase the upload size.
It’s a simple file to edit but if you’re considering a new theme, try a different method. Solve the ‘link you followed has expired’ error with the following steps.
Steps
Find the php file (either via FTP or inside your Admin dashboard at Appearance > Theme Editor)
Change upload_max_size and post_max_size in the above to the size required
Look at the max_execution_time and change it if it’s not long enough
Save changes
Check if the error still occurs
It might be tempting to make these limits massive but be careful as hackers can use this against you. If the timeout value is really high and they get into your website, they could run all sorts of dangerous, long-running scripts. In other cases, a bug might cause a script to take abnormally long to process, which can slow your site down to a standstill.
Method 2: Increase limits in the .htaccess file
It’s also possible to change the .htaccess file to solve your issue.
Here are the steps:
Find the.htaccess file (usually hidden in the root directory of your WordPress installation)
If you can’t find the functions.php or .htaccess files or don’t like to edit them, there’s another method. To solve the issue of “the link you followed has expired”message, you can edit the php.ini file, which contains settings for your server’s implementation of PHP.
Some shared website hosting companies don’t give access to the file, which may be a roadblock for you. If that’s the case for you, it’s best to contact your hosting provider directly.
If you’re sure you have access, you can perform the following steps:
Access the ini file using anFTP program
Create a backup copy before editing
Open the file and search for the following lines which are scattered throughout the file:
You can always contact your host provider to change these settings. They’ll likely ask for a screenshot of the ‘the link you followed has expired’ message so ensure you take one when it happens. If you didn’t, you can recreate the error to get a screenshot.
You could also choose to send them an email explaining the issue. Request that they increase the limits of the following:
Detailed instructions for plugin installation through WordPress, and through FTP.
The installation process for our plugins and add-ons is simple and straightforward, and shouldn’t cause you any trouble. Regardless of your previous experiences with WordPress plugins, you aren’t likely to have any problems if you follow these simple steps:
Download the file from our store Once you purchase our products, you can download the ZIP file from our TMS Store or from the email that you received when you made the purchase (some hosting providers treat it as Spam, so please check your Spam folder as well). Also, in that e-mail you will find the credentials for TMS Store, where you can download the full version of the plugin. The zip file always contains the latest version of plugins and add-ons.
Upload the plugin into WordPress - there are two ways you can do this:
Option 1 (easiest) - Open your WordPress admin panel, go to Plugins ->
Add new ->
Upload -> and under "Choose File" select the zip file that you downloaded from our TMS Store:
Option 2 (in case the first option doesn’t work) – Unzip the file that you downloaded from our TMS Store. Open your WordPress installation folder to an FTP manager (it could be CyberDuck, FileZilla, Total Commander, or some other), go to wp-content/plugins/, and upload the folder you previously downloaded and unzipped.
Activate the plugin
If you've missed the "Activate" option that comes up when you install the plugin, just go to your WordPress admin panel -> Plugins, find the plugin you just installed, and click “Activate”. Plugin installed!
Optional – enter your purchase code for auto-updates This is only necessary if you want to receive auto-updates for the plugin. Every purchase on our TMS Store has a unique purchase code: you can check it whenever you need it in the Downloads section. We use this purchase code for auto-update feature authentication.
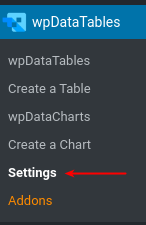
For wpDataTables and all wpDataTables add-ons, go to your WordPress Admin, open wpDataTables -> Settings -> Activation tab, paste the Item Purchase Code in the corresponding input box, and click on the blue "Activate" button.
For Amelia, go to your WordPress Admin, open Amelia -> Settings -> Activation, paste the Item Purchase Code in the corresponding input box, and click on the blue "Activate" button.
For the Amelia plugin - if you see the following image in Settings/Activation, that means that you have the Lite version of the plugin installed. It needs to be removed, and the full version installed in order for the Activation field to become available:
For the wpDataTables plugin - If the Activation tab is missing in the Settings, this means that you have the Lite version installed. It needs to be deactivated and deleted, and the full version installed in order to activate the license:
Please note: If you purchased the plugin through the Envato marketplace, the activation procedure doesn't require you to enter your purchase code. We have an API for that, so to activate your Envato license leave the Purchase code field blank, and click on "ACTIVATE WITH ENVATO".
If you have any problems when uploading your file into WordPress, please check your server permissions. You'll know there are issues if WordPress displays this message:
Please note that wpDataTables is around 13 MB in size, and Amelia is around 7 MB in size, so if you are not able to upload it through WordPress Plugins page, you will probably need to increase the following:
upload_max_file size,
post_max_size,
max_execution_time
You should be able to find these values in your php.ini file or on your hosting panel. If you can’t find it yourself please ask your hosting provider to provide it.
5. TMS Store
Date: December 8th, 2021
Overview:
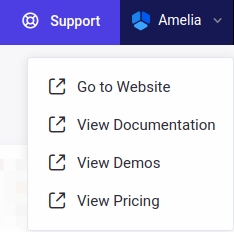
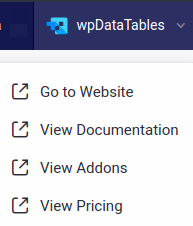
Through our store, you can see all your purchased licenses, buy new licenses, contact support, access the main websites, official documentation, demos, add-ons, and pricing, change your password, submit refund requests, cancel subscriptions, view your purchase codes, and download the installation files.
Header:
Clicking on the "Support" button will open up the ticketing platform where you can submit a new ticket or respond to an existing ticket you may have raised with us.
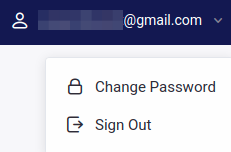
The Profile button, where you see your email address, offers an option to change your password, and log out of the store:
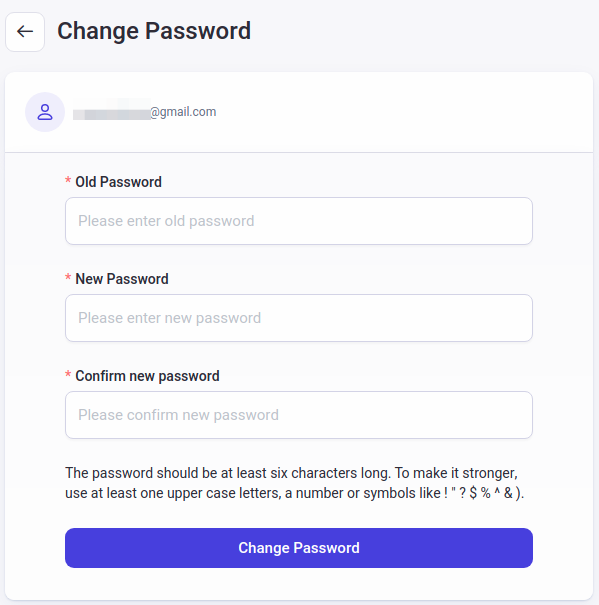
Clicking on "Change Password" opens a new window, where you can change the password you use to log into the store:
Please note: Since you're purchasing our plugins through a reseller (Paddle), you are not able to change the email address associated with the purchase because we cannot modify the email on their end automatically. If you need to change the email address associated with your purchase, please email us at [email protected] from the email address that was used to purchase the plugin, and let us know what the new email address will be associated with the purchase. If you're transferring the ownership to someone else, please make sure to update your billing data through the store (only valid for Subscription-based licenses, described below).
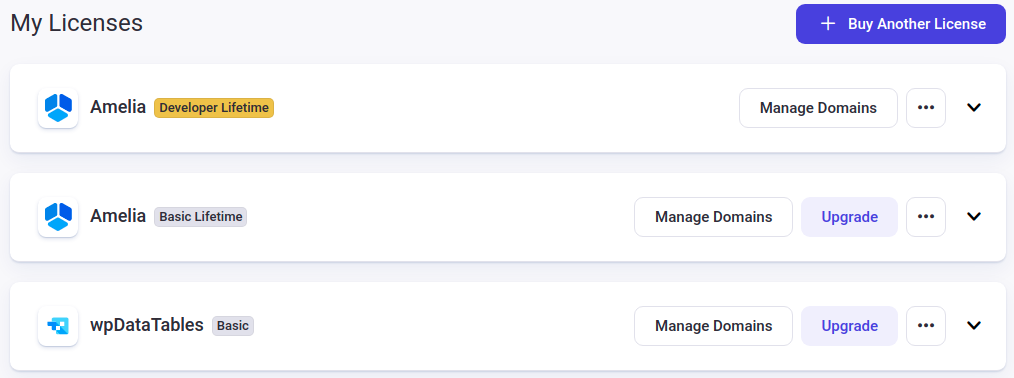
My Licenses:
Here you can see all licenses you have purchased. Clicking on the down arrow on the right-hand side expands each license. There are differences between how Lifetime and Subscription licenses are displayed:
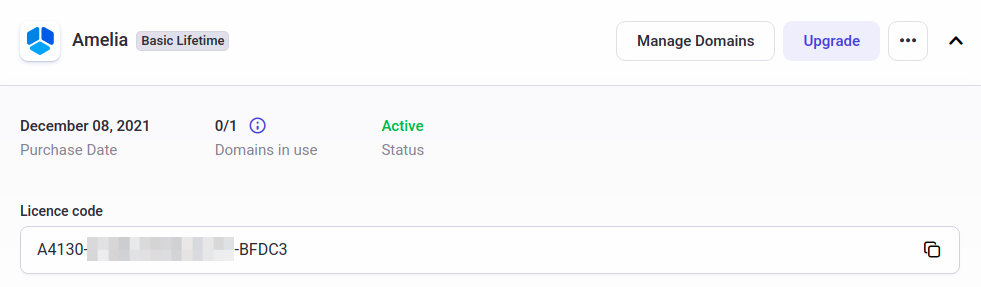
The Lifetime license shows the purchase date, the number of domains in use (domains where the license is active), the status of your license, and the purchase code which can be copied by clicking on the copy icon on the right of the field where the purchase code is displayed. This code can be pasted in the plugin's Settings/Activation section, in order to activate the purchase code. After activation, the "Domains in use" will be updated in the store.
Please note: The purchase code activation is only possible through your WordPress website, under the plugin's Settings/Activation tab, not through the store.
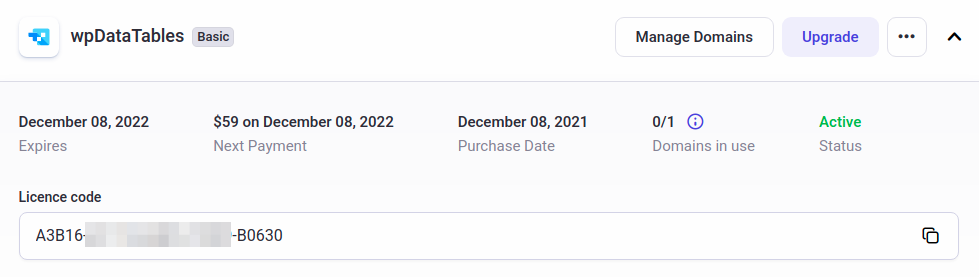
The Subscription license shows the date when the license will expire, what the next payment amount will be, the purchase date, domains in use, status, and the purchase code.
Please note: Every subscription-based license is set to renew every year, on the date of purchase, unless you unsubscribe through the store. If you unsubscribe, you will not be charged on the next renewal date, and after that date passes, you will still be able to use the plugin (the version you updated to last before the subscription expired), but you won't be able to receive new updates, and you won't have access to premium support.
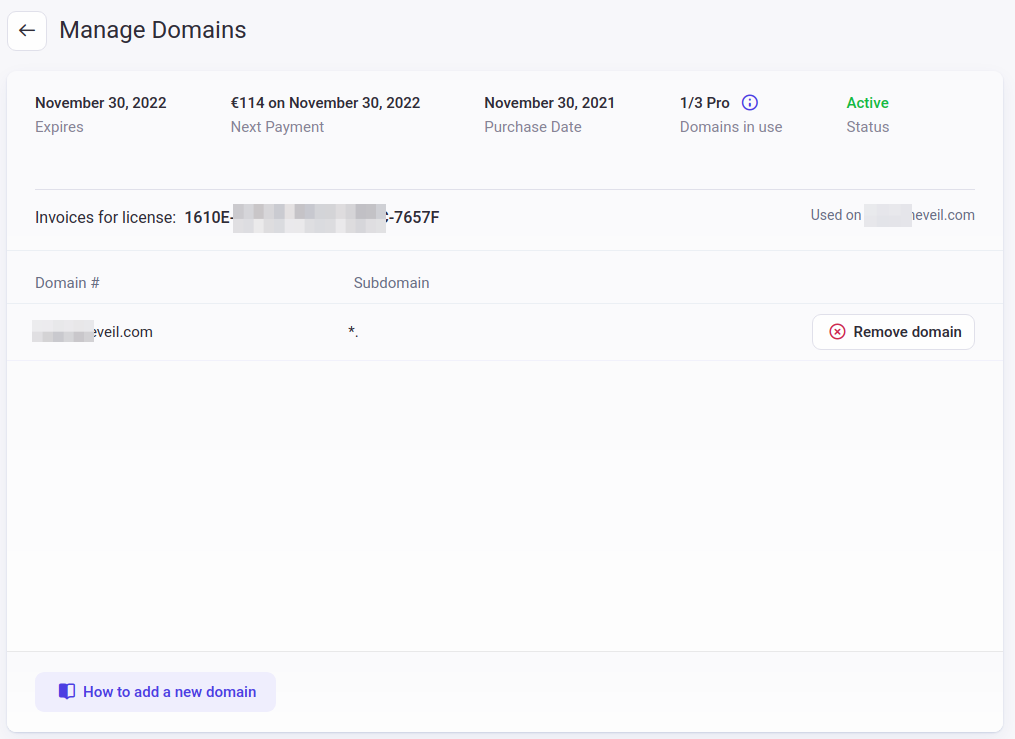
Manage Domains:
Clicking on the "Manage Domains" button shows you the websites (domains and subdomains) on which the purchase code has been activated:
From this screen, you can remotely deactivate the license on any registered domain.
Upgrade:
Clicking on this button, you're able to upgrade your license to a higher tier (Basic to Pro, or Developer, or Basic Lifetime, Pro Lifetime, or Developer Lifetime, and so on). For more details about upgrading the license, please take a look at this article.
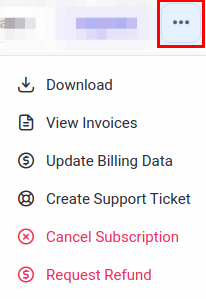
The Three Dots:
From here, you can:
Download the installation file in ZIP format (it's always going to be the latest version of the plugin);
View your invoices. The invoices show all previous changes on your card, so it will show you the invoice for the initial purchase and any potential upgrades you may have gone through:
When you click on "Download Invoice", you will see the same receipt you received in your inbox when you initially purchased the plugin. This action doesn't actually download the invoice (yet), but when it opens a new page, you can print it in PDF by hitting CTRL+P on your keyboard, and then choosing the "Destination" as "Save to PDF":
Update Billing Data allows you to update the payment method that will be used for upcoming renewals of Subscription-based licenses.
Create Support Ticket opens this ticketing platform in a new tab, where you can submit a new ticket.
Cancel Subscription (only available for Subscription-based licenses) allows you to cancel your subscription. Every subscription-based license is set to renew every year, on the date of purchase, unless you unsubscribe through the store. If you unsubscribe, you will not be charged on the next renewal date, and after that date passes, you will still be able to use the plugin (the version you updated to last before the subscription expired), but you won't be able to receive new updates, and you won't have access to premium support.
Request Refund (only available within 15 days from the date of purchase). If you're not satisfied with the plugin, or you have issues our support wasn't able to fix, you can submit a refund request within 15 days from the date of purchase.
6. Upgrading Licenses
Updated: July 14th, 2023.
Licenses can be upgraded to higher tiers through our store, by clicking on the "Upgrade" button:
A new modal opens up where you can choose available upgrade plans:
Please note that the Lifetime purchases can't be upgraded to Subscription plans, so if you have a Pro Lifetime plan, you cannot upgrade to Developer Subscription. Also, depending on the license you currently have, different options will be offered in the modal.
What you should know about the upgrade:
The price that you will pay for the upgrade will be a pro-rated charge, meaning you won't be paying for the price difference between licenses, since we cannot refund the time spent on the license you currently have.
Example:
You bought a Basic Yearly license for Amelia, which costs $69 (roughly $0.19 per day).
After 100 days, you want to upgrade to 3-domain Pro Yearly, which costs $199 (roughly $0.55 per day).
Time remaining on Basic (what going to reduce the upgrade price): $50.35 (265 * 0.19)
Time spent on Basic: $55 (100 * 0.55)
Time remaining on Pro: $145.75 (265 * 0.55)
So, the price is not Pro - Basic (199-69=130), but instead a pro-rated charge, and you are going to be charged around $147.75 - $50.35 = $97.4.
If you're upgrading from a yearly subscription license to a yearly subscription license, it still renews on the same date (1 year after purchase) and your purchase code remains the same. This is basically why the prices are pro-rated.
Please note:Directly upgrading Lifetime licenses purchased after June 1st, 2021 is currently not possible, but you can, of course, acquire a new license and receive a refund for the previous purchase. You would need to purchase a new Lifetime License and reach out to us through a ticket, posting both purchase codes in a PRIVATE ticket, and our support managers will refund the amount of the originally purchased license retroactively.
Please check your receipt for the old purchase and verify that the card number or the PayPal account you used is still the same.
Please note: The prices are subject to change without prior notice and the prices listed above are to be used solely for the explanation of how upgrades work.
7. Refund Policy
Customer satisfaction and long-term relationship is our primary goal here at TMS. So, even though we are pretty confident in the quality of Amelia, and are pretty sure you won’t ever need a refund, we have established a straightforward customer-friendly refund policy.
When a refund might be given
If you are experiencing technical difficulties with your copy of Amelia, please feel free to open a ticket on this platform, so our support managers can help. They are able to resolve the problems in almost all cases.
However, if you feel that the product just doesn’t work for you, you can request a refund. As Amelia is a digital non-revokable product, we issue refunds only within 15 days after purchase. In case you decide to use this option, please provide us with feedback as it is vital for us to make Amelia better with each release.
When a refund might not be given
We do not issue refunds when 15 days after the purchase have passed. Please note that it is customers responsibility to understand this upon purchasing products from us.
How to submit a refund request
Please log in to http://store.tms-plugins.com/ and under "My Licenses" click on the Three Dots in the right-hand side of the license you want to submit a refund request for:
If you don't see it, that means that the 15-day money-back guarantee period ended, and as per our refund policies (Amelia Refund Policy, wpDataTables Refund Policy), you're no longer eligible for a refund. After you submit a refund request, you will not receive any confirmation emails, but you will see that the button is grayed out:
That means that the refund request is successfully submitted and that you will receive your refund in 5 - 7 business days.
8. Licenses, Purchase, and Activation
Edited Date: July 14th, 2023
Licenses
Our products can be purchased through the Envato marketplace, and through our websites:
Please note: Envato licenses are lifetime licenses, but they are limited to 6 months of support. Also, there are no plans (Basic, Pro, and Developer), like in TMS Store Licenses, and all licenses purchased through Envato are equal to the Basic licenses found on our websites.
TMS Store licenses can be yearly subscription-based licenses or Lifetime licenses. For differences in pricing and license details, please refer to our pricing pages:
Some hosting providers consider these e-mails as SPAM, so if you don't see them in your inbox, please check your SPAM and JUNK folders, and if you still can't see the emails received, please feel free to open a support ticket, and our support managers will gladly help.
The download link in our e-mail expires after 5 downloads, but you are able to download the plugin at any time by logging into our store.
When you obtain the purchase code from our e-mail, or from the store, you can activate it when you install the plugin.
All plugins and add-ons are activated through the Settings tab for that specific plugin:
Amelia:
wpDataTables and wpDataTables Add-ons:
If you purchased the plugin through the Envato marketplace, you don't actually need the purchase code to activate the license. The "Purchase Code" field is reserved for purchases made through our website and needs to stay blank when you're activating with Envato.
So, all you need to do is click on the green "ACTIVATE WITH ENVATO" button, and the plugin will take you to the Envato log-in page (if you're not logged in already), and the license will be activated.
As for purchases made through our website, you need to enter the purchase code in its designated field, and click on the blue "ACTIVATE" button.
If you don't see the Activation tab in Settings, that means that you're running the Lite version of the plugin. It needs to be deactivated/deleted, and the full version installed in order to activate the license.
Please note: Formidable Forms integration for wpDataTables and Gravity Forms Integration for wpDataTables are add-ons that require wpDataTables and the core forms plugins to be installed (Gravity Forms and Formidable Forms). When you're activating these add-ons, please note that the core plugin needs to be activated as well.
This completes the license activation, and if you configured your WordPress website to receive automatic plugin updates, it will always show when a new update is available. If you wish to manually update the plugin, you will need to download the latest version from our store (the download button always acquires the most recent version). If you don't have auto-updates enabled, you can always subscribe to our newsletters, to be informed about plugin updates, new features, promotions, giveaways, or freebies: